If you want your business to thrive, SEO is a must. When it comes to SEO, local SEO cannot be ignored, which simply means the presence of your platform on Google My Business. Well, that’s good for people with Android devices who use Google Maps as their navigation. But what if they’re on iOS and using Apple Maps? Well, in that case, they won’t find your business there, and where there are more than 1.334 billion users, it’s essential that your business has a presence in Apple’s map tool.
If you’re lacking this, you’re lacking potential customers that might elevate your revenue. But you don’t have to worry about this because Apple Business Connect is the solution.
Let’s get to know everything and bring your business’ presence to Apple Maps if not already.
What’s Apple Business Connect?
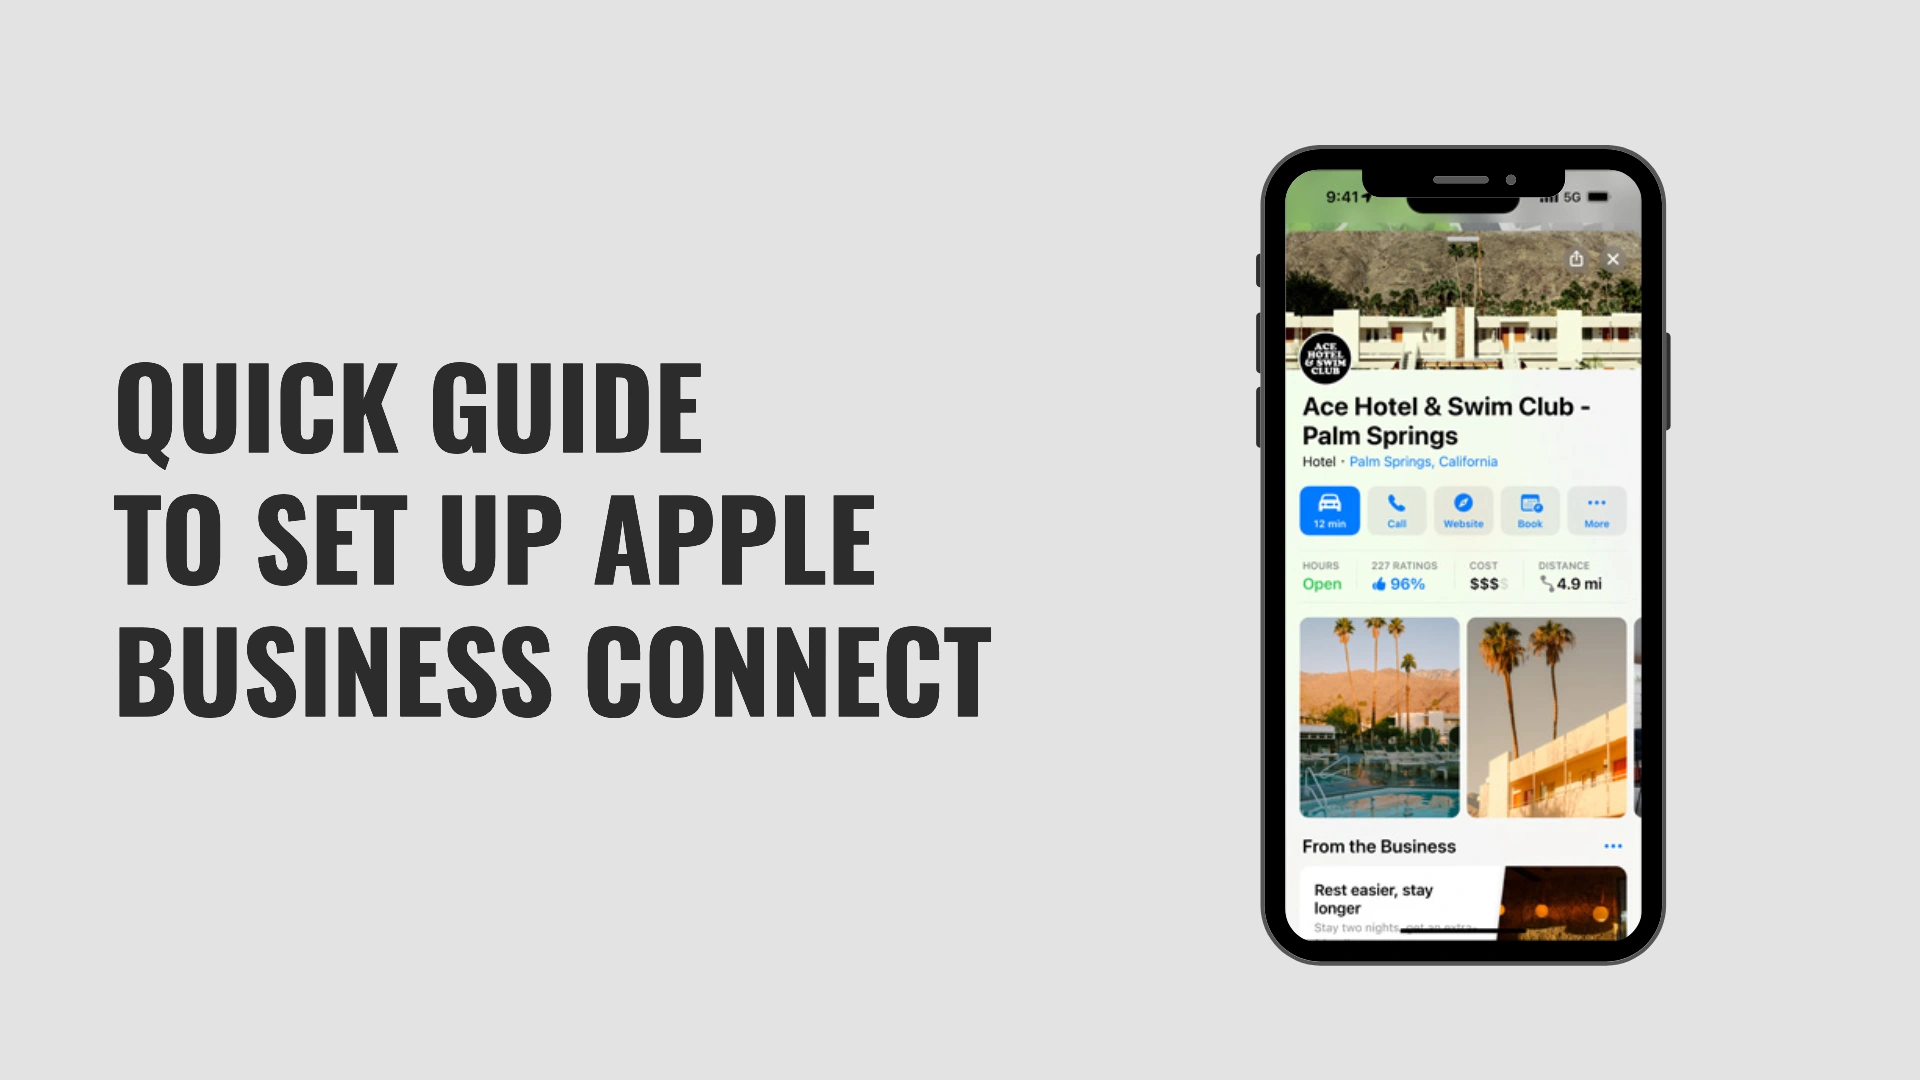
Similar to Google My Business, Apple Business Connect enables users to add their online presence to the maps Apple manages as well as on Apple Wallet, Siri, and more.
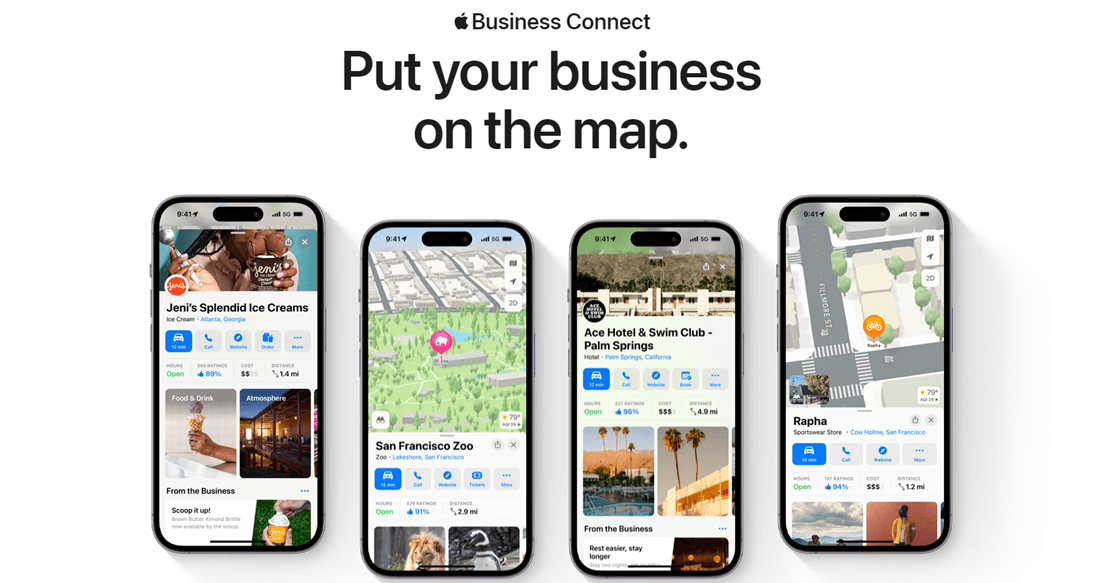
Business owners can showcase all the details on the map, which would help a customer to learn more about the services. For example, using it, you can:
- Display business hours.
- Provide direction to your business place.
- Showcase reviews.
- Showcase business gallery.
- Provide contact details.
You can also add text, images, offers, and events using Showcases. With all of these, it becomes easier for users with iPhones (or Apple devices) to find and contact you whenever they need your services or any support in accordance with using Apple Maps.
Why You Need Apple Business Connect (Benefits)
The benefits are far beyond what is mentioned above. When you use Apple Business Connect, you open more possibilities for your business to grow, such as:
- More leads.
- Local SEO X2, you probably are not going to ignore Google My Business as well.
- Easy commute for staff through cabs.
- Easy commute for customers, too.
- Share offers and announcements.
How to Use It for Your Business?
Utilizing it is easy. All you need to do is follow simple steps, and your business will have a presence on Apple Maps and other Apple services.
Step 1- Create an Account on Apple Business Connect
By using Apple Business Connect, you can create three types of accounts:
- Small Business Account.
- Enterprise Account.
- Third-party Partner Account
If your business has more than 25 locations or multiple businesses with multiple locations, you need to create the Enterprise account; if not, you can continue with the Small Business Account. And the following guide will also help you create that.
First, go to Apple Business Connect, and sign in with your Apple account. If you don’t have one, you need to create an iCloud account.
When you sign in to Apple Business Connect, the first thing you need to do is accept the Terms of Use.
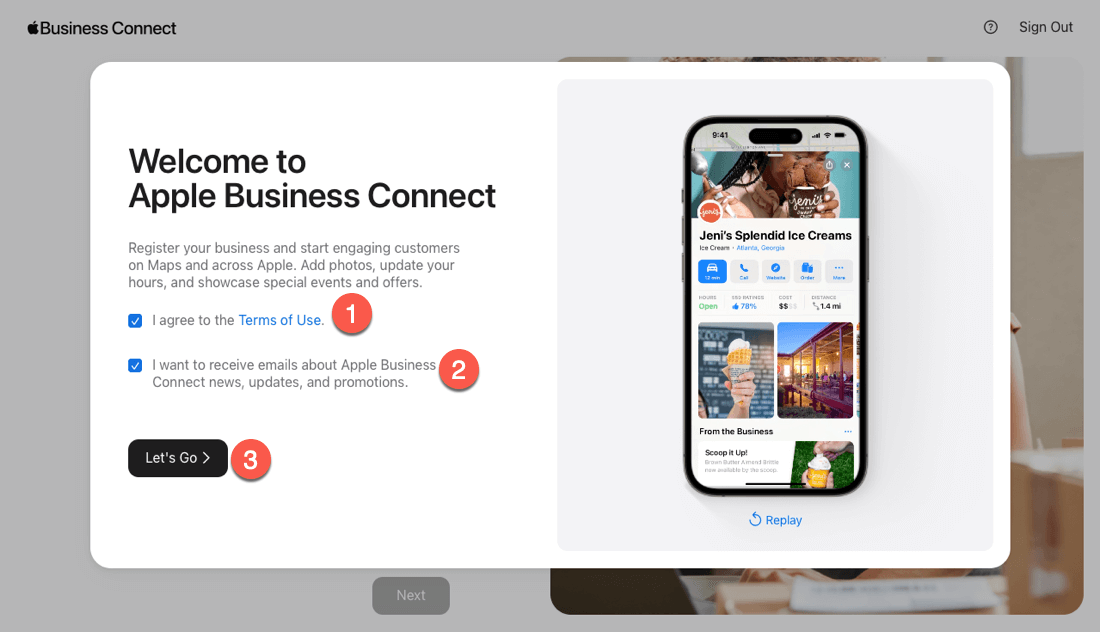
Check “I agree to the Terms of Use.” If you also want to receive updates from Apple Business Connect, keep the “I want to receive Apple emails” selected and then click on the Let’s Go button.

This will bring three choices of what type of account you want to create. Among Small Business, Enterprise, and Third-party Partner, select Small Business and click Next.
Step 2 – Add Your Business Details
Once you select your business type, you are directed to add details about your business. First, you need to Add one of your business locations.
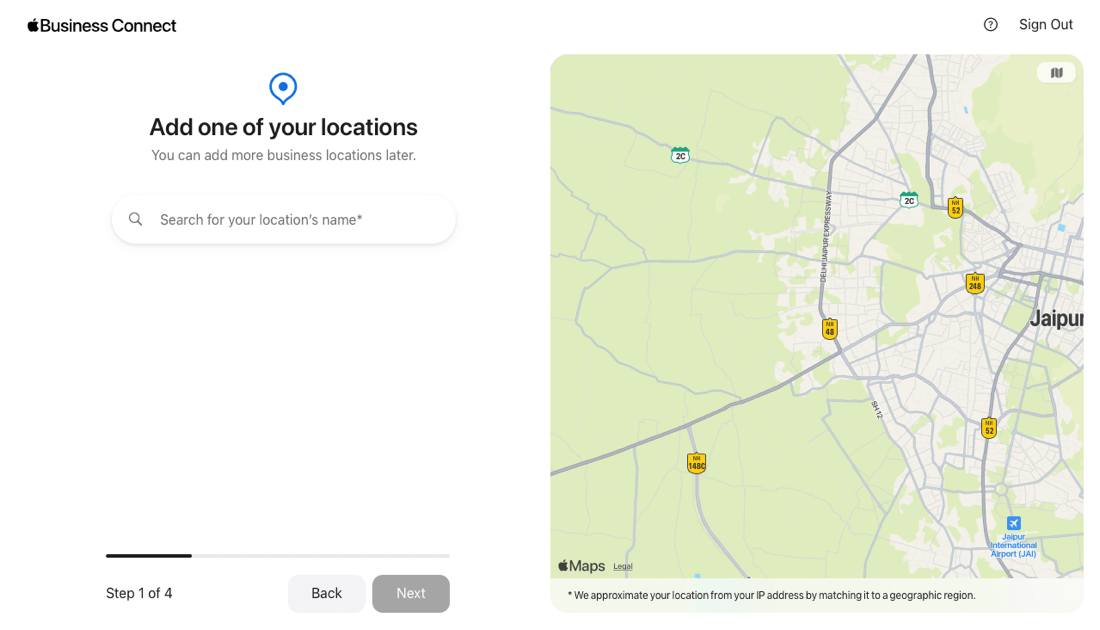
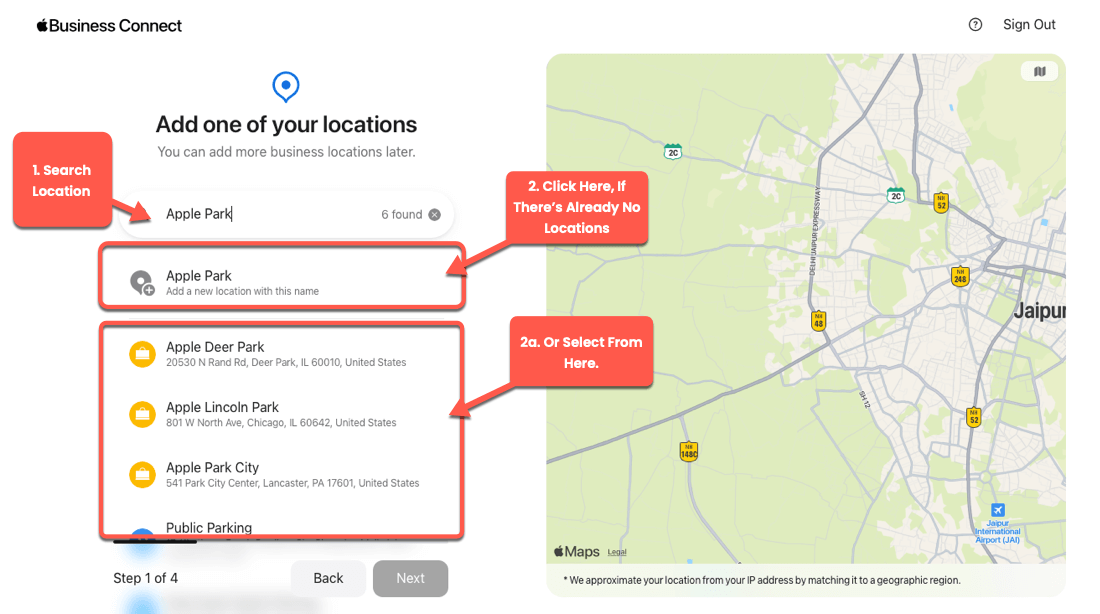
Search your business location, and if you find it, click on it. And if not, in case it’s your first time using Apple Business Connect, then click on the “Add a new location with this name,” option.
Complete all fields to add details about your business location.
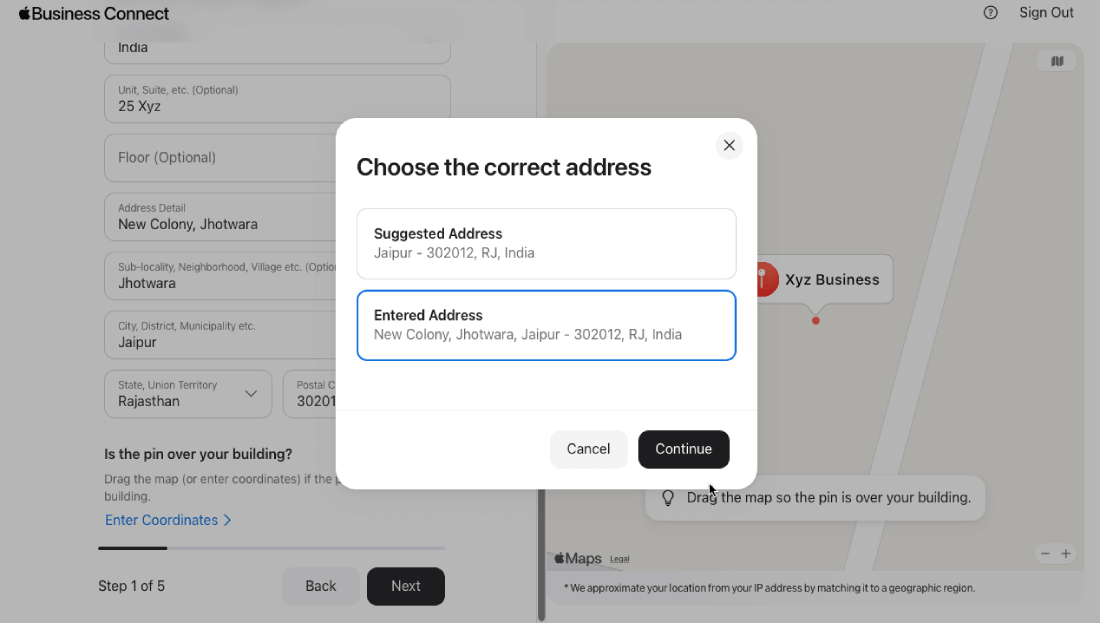
Once done, select either the Suggested Address or the Entered Address, which is correct, and move to the next step.
Step 3 – Add More Details About the Business
Once you’ve added the business location’s details, you’ll be prompted to enter details about your business type.
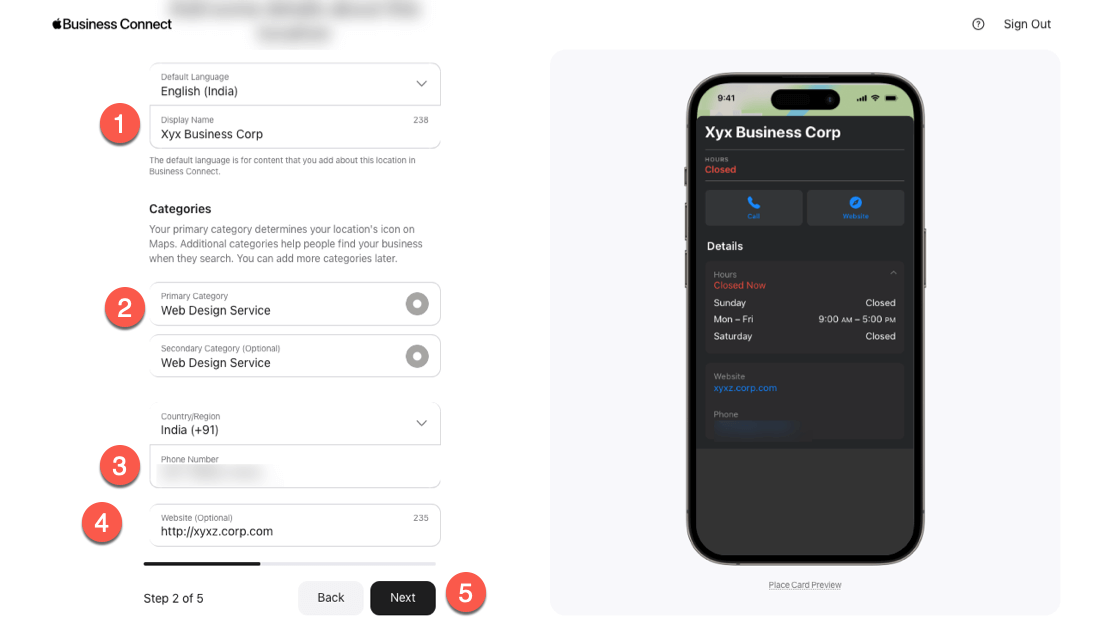
Enter the details as appropriate in the fields. Then, you’ll be prompted to add your business’s working hours.
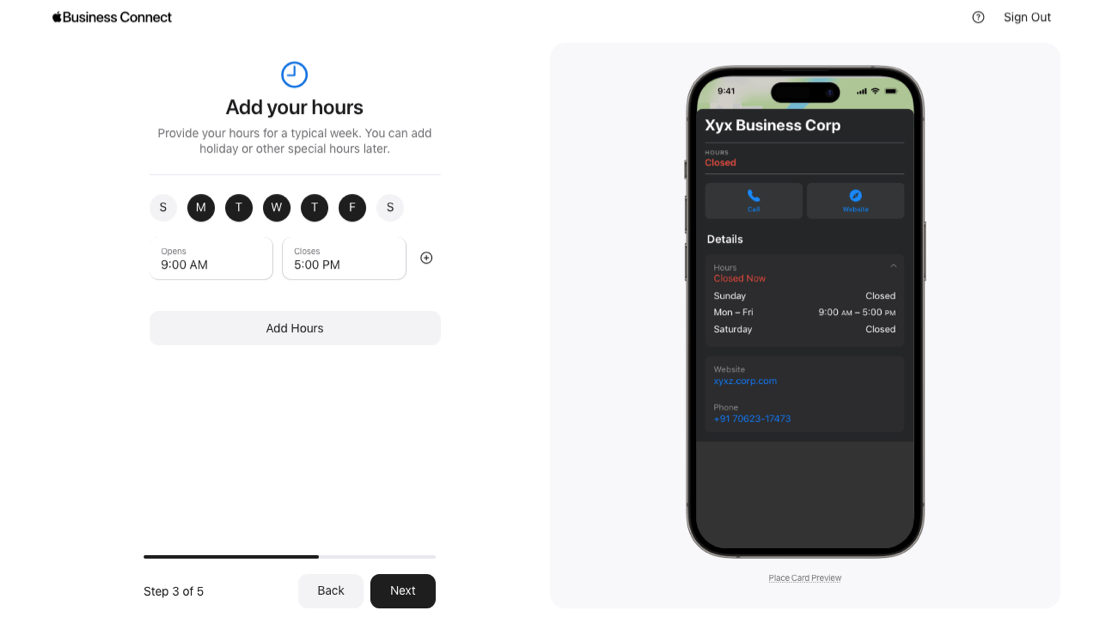
Add business hours as appropriate and then click Next. Then, you need to enter your business’s legal details.
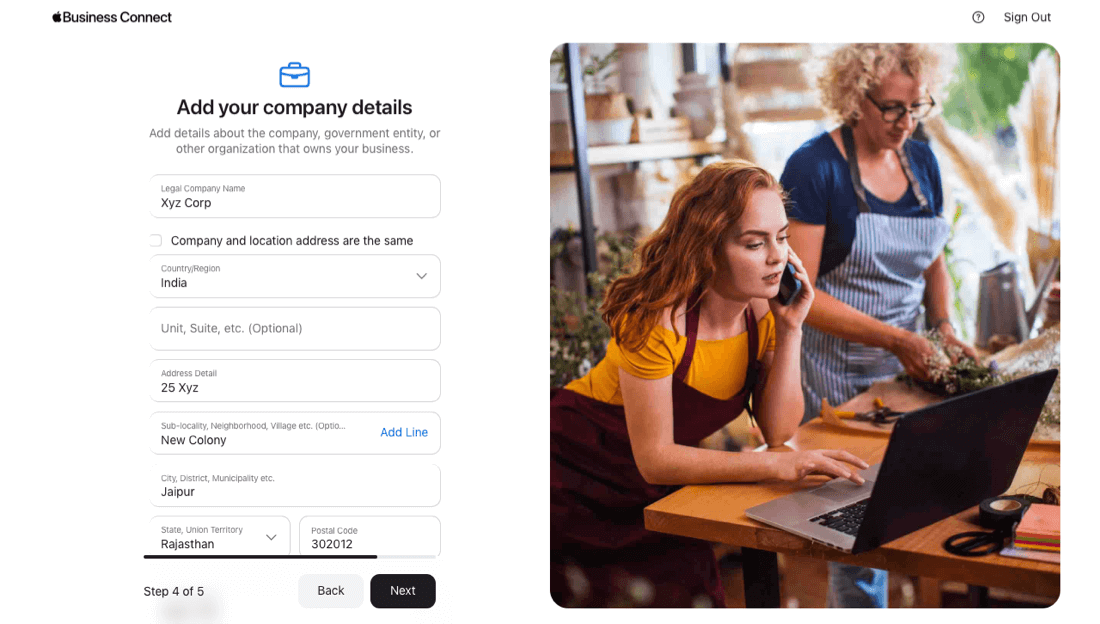
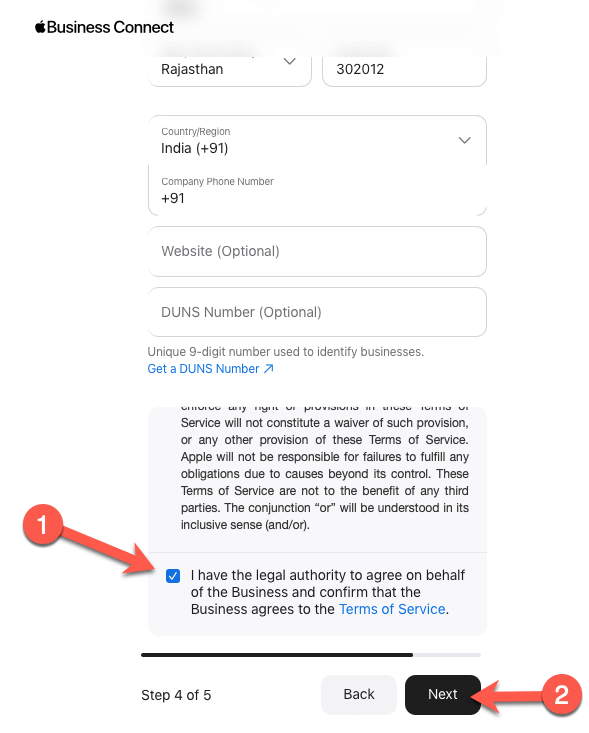
Once added the details, ensure you accept the Terms of Service.
After submitting the details, you need to verify your business. For that, you need to upload an official document (such as a lease, insurance policy, or utility bill) showing this location’s name and address. Verification can take up to 5 business days.
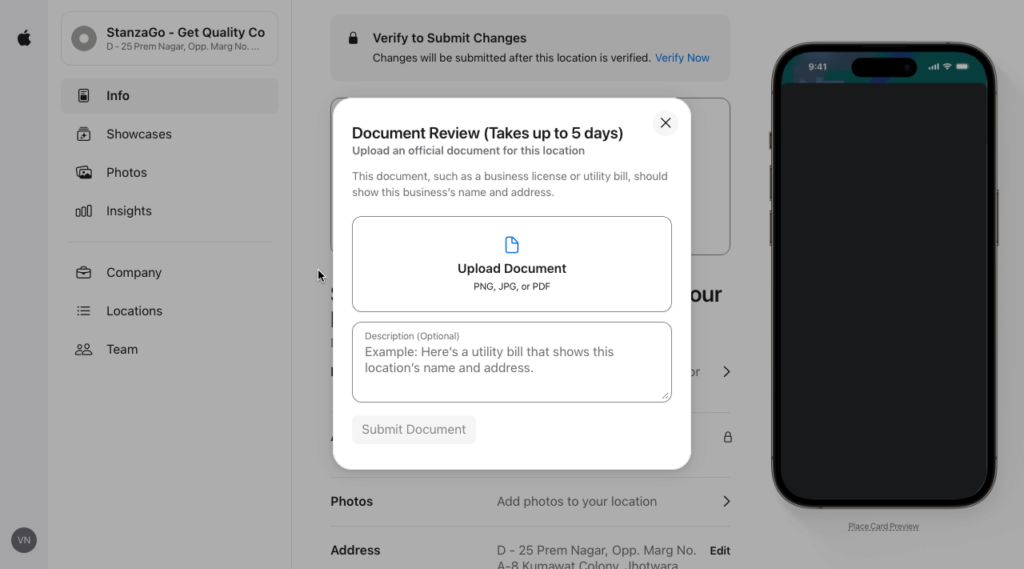
You can skip this step and continue exploring Apple Business Connect. Or upload documents and then explore.
Step 4 – Explore the Dashboard
After creating your Small Business Account in Apple Business Connect, you’ll find its dashboard, which looks like the following:
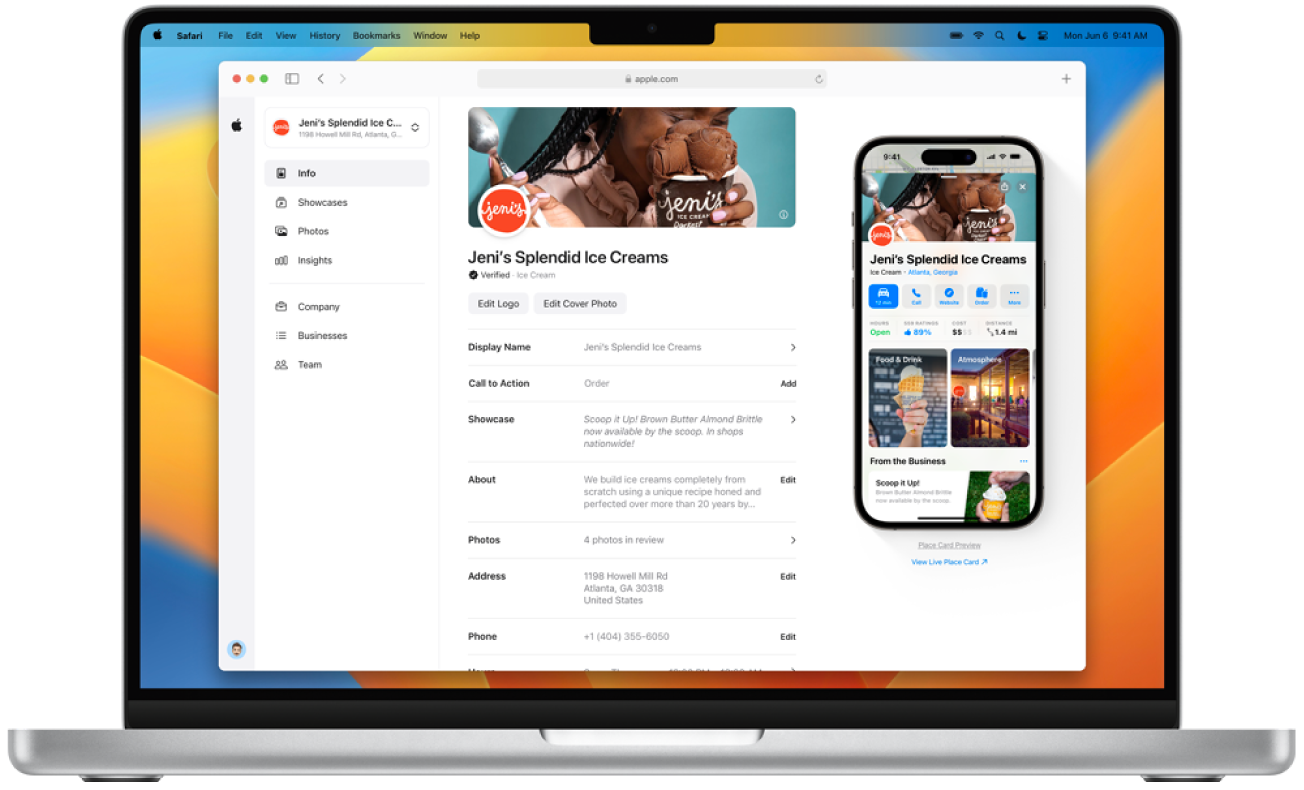
Here, you can make all the necessary changes to your business profile on Apple Business Connect. However, some options, such as adding a business description, changing phone numbers, photos, and more, cannot be used until verification.
Step 5 – Manage Your Business on Apple Business Connect
There are 7 options available inside the Apple Business Connect dashboard.
1. Info
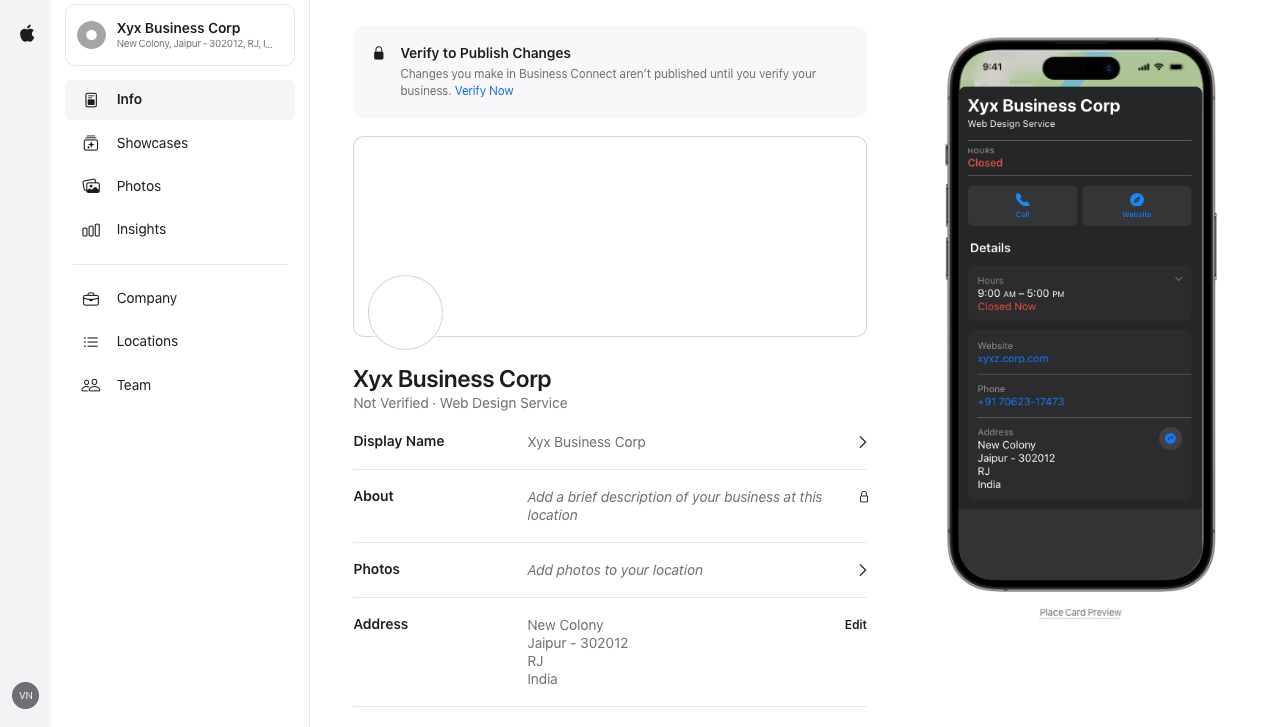
Using this, you can make changes to your business profile, such as changing the Display name, about, status, and more.
2. Showcases
Here, you get the option to highlight your services or products by creating different events and offers.
3. Photos
The photos option lets you add visual details about your business. You can display how your business looks and what users can expect, and you can do much more using images.
4. Insights
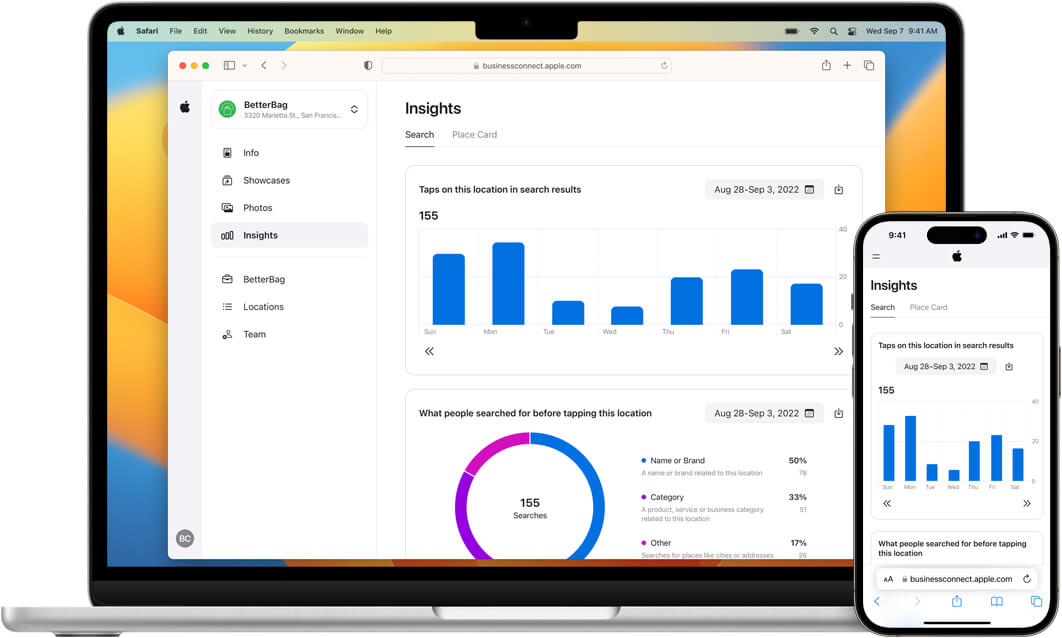
This feature of Apple Business Connect lets you understand how your customers find and interact with your business. Track how well your business profile is working and what you can do to improve it.
5. Company
This option lets you make changes to your business’ legal details.
6. Locations
Using the Locations option, you can manage different addresses of your business.
7. Team
Add or remove members of your team to your business’ Apple Business Connect account. Assign them new roles and change their hierarchy whenever needed.
Conclusion
Apple Business Connect is the key to seeing your business on Apple Maps, Wallet, Siri, and more by iPhone users in your area. It’s easy to set up and offers many benefits, from increased leads and improved SEO to easier commutes for you and your customers.
Plus, you can showcase your excellent services, photos, and even special offers. It’s like a mini billboard for your business, right on their phones!
By following the above steps, you can easily list your business on Apply Business Connect and reap all the benefits it offers.





0 Comments